As you may know a microphone is a speaker in reverse. So here’s an example of how I turned a useless guitar amp into a sub-kick (sub-bass) mic.
Step 1: get a speaker
Historically people in the studio have used speaker cones from Yamaha NS10 speakers (studio monitors) because these were cheap and crappy and widely available back in the day. Eventually Yamaha caught up and started offering pre-made sub-kick mics, but that’s beside the point, we’re DIY-ing here, are we not?
The thing is you can use any speaker cone you have around. And once you wire the speaker cone you need some way to mount it. There are a lot of creative options out there. In my case, I decided to not bother and use an amp which solves the mounting challenges.
Here’s the amp with a Boss pedal for scale:
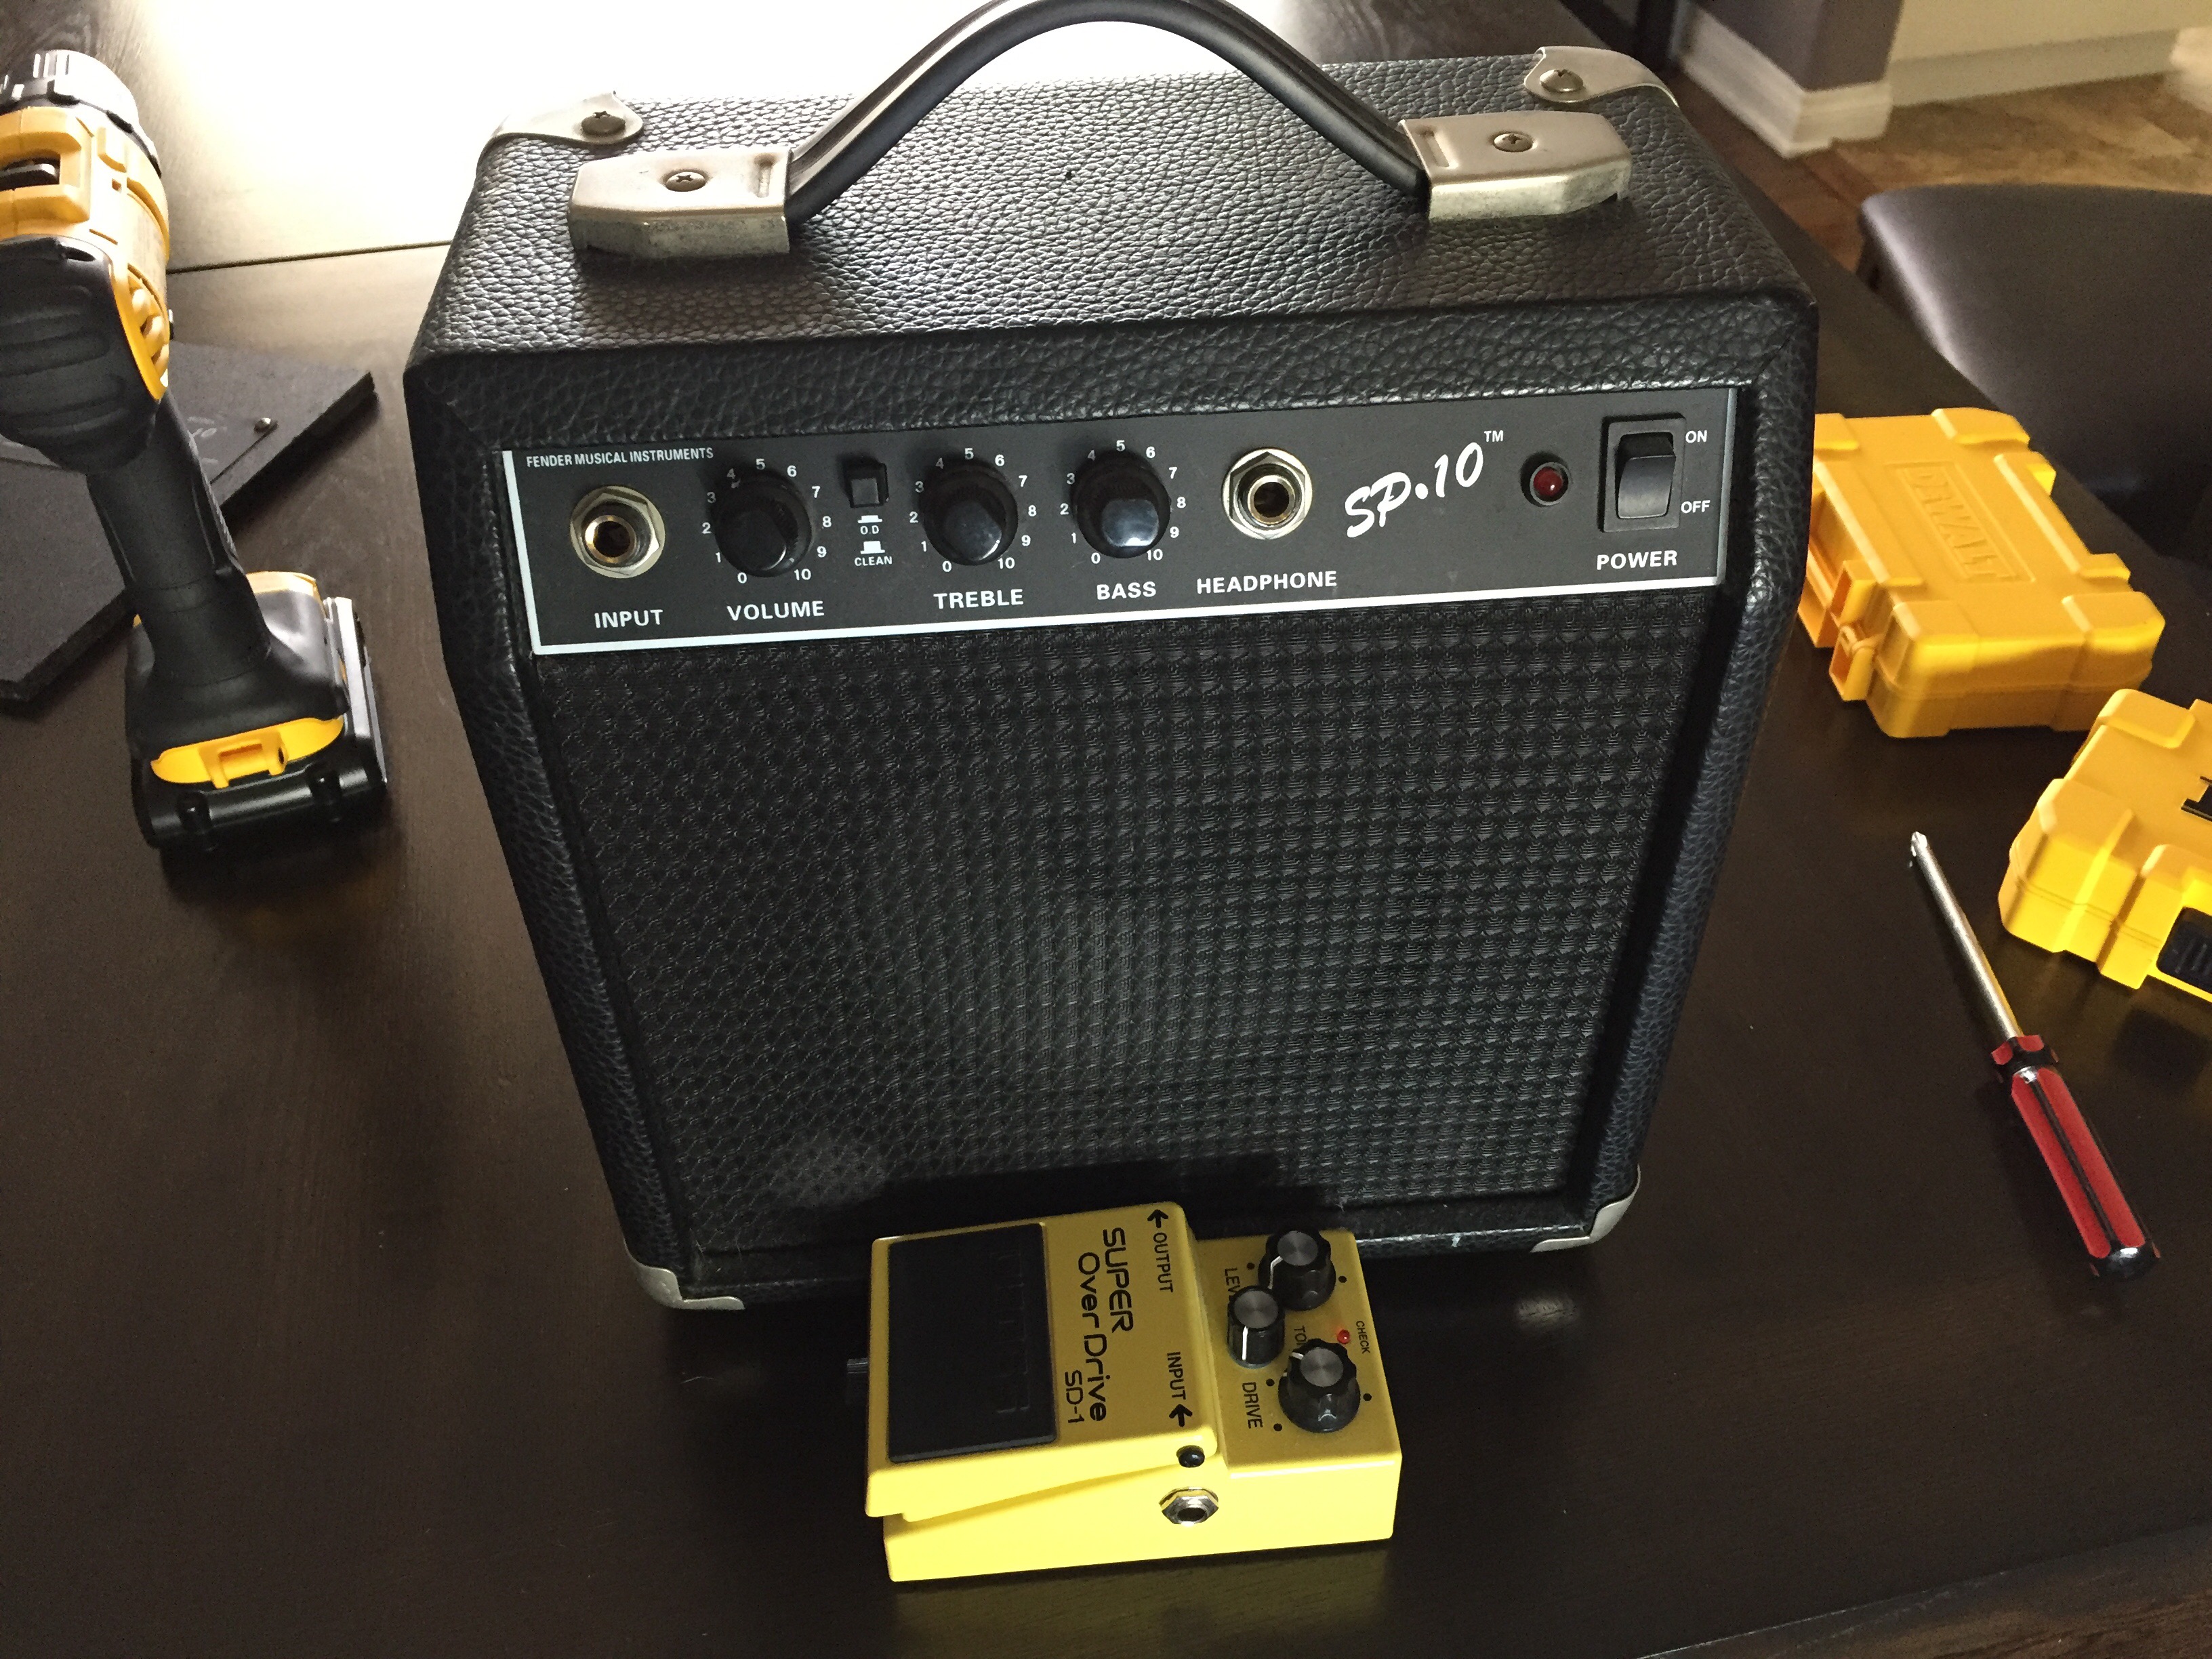
It’s a tiny thing I got as part of a Fender “starter pack” including a Squire guitar. It’s probably unsellable, that’s why I kept it around.
Step 2: solder a mic cable
I opened the back, tucked away the power cord and and unsoldered the two wires that went to the speaker. This way if later I decide to try and sell or use the amp as an amp, I can always restore it to the original condition.

Next I took a short mic/patch cable, cut out one end and soldered it to the speaker cone.
As you can see the shielding of the mic cable goes to the – (negative) mark of the speaker. The mic cable has three wires – you ignore one of them, solder the shield to the negative and the remaining one to the positive.
How do you decide which one to solder and which to ignore? Trial and error is one way. You can’t blow anything up so… But if you look at the connection of the mic cable you’ll see “pin” numbers. The one marked 2 goes to the speaker’s +, and pin 1 goes to the -.
Step 3: done
And this is it. Closing the back cover and it’s all done:

No more excuses not to have awesome low end on the kick drum. Or bass guitar even?